
Provisioning with a pairing code
Bring a device online by entering a code generated in Things5
An installer, the end user or a line operator enters on the device a code generated by Things5. This is the recommended provisioning flow.
How it works
- In Things5, a user authorized on the machine generates a provisioning code.
- The code is entered on the device (display, configuration app, etc.).
- The device sends the code to Things5 together with its own confirmation code, which it shows to the user. The same confirmation code appears in Things5: the user checks that the two codes match and confirms.
- The device receives its certificate, private key and CA certificate, and connects.
The user must confirm only if the two codes match
Step 3 is what prevents another device from taking the place of yours.
The full sequence, with who starts each step:
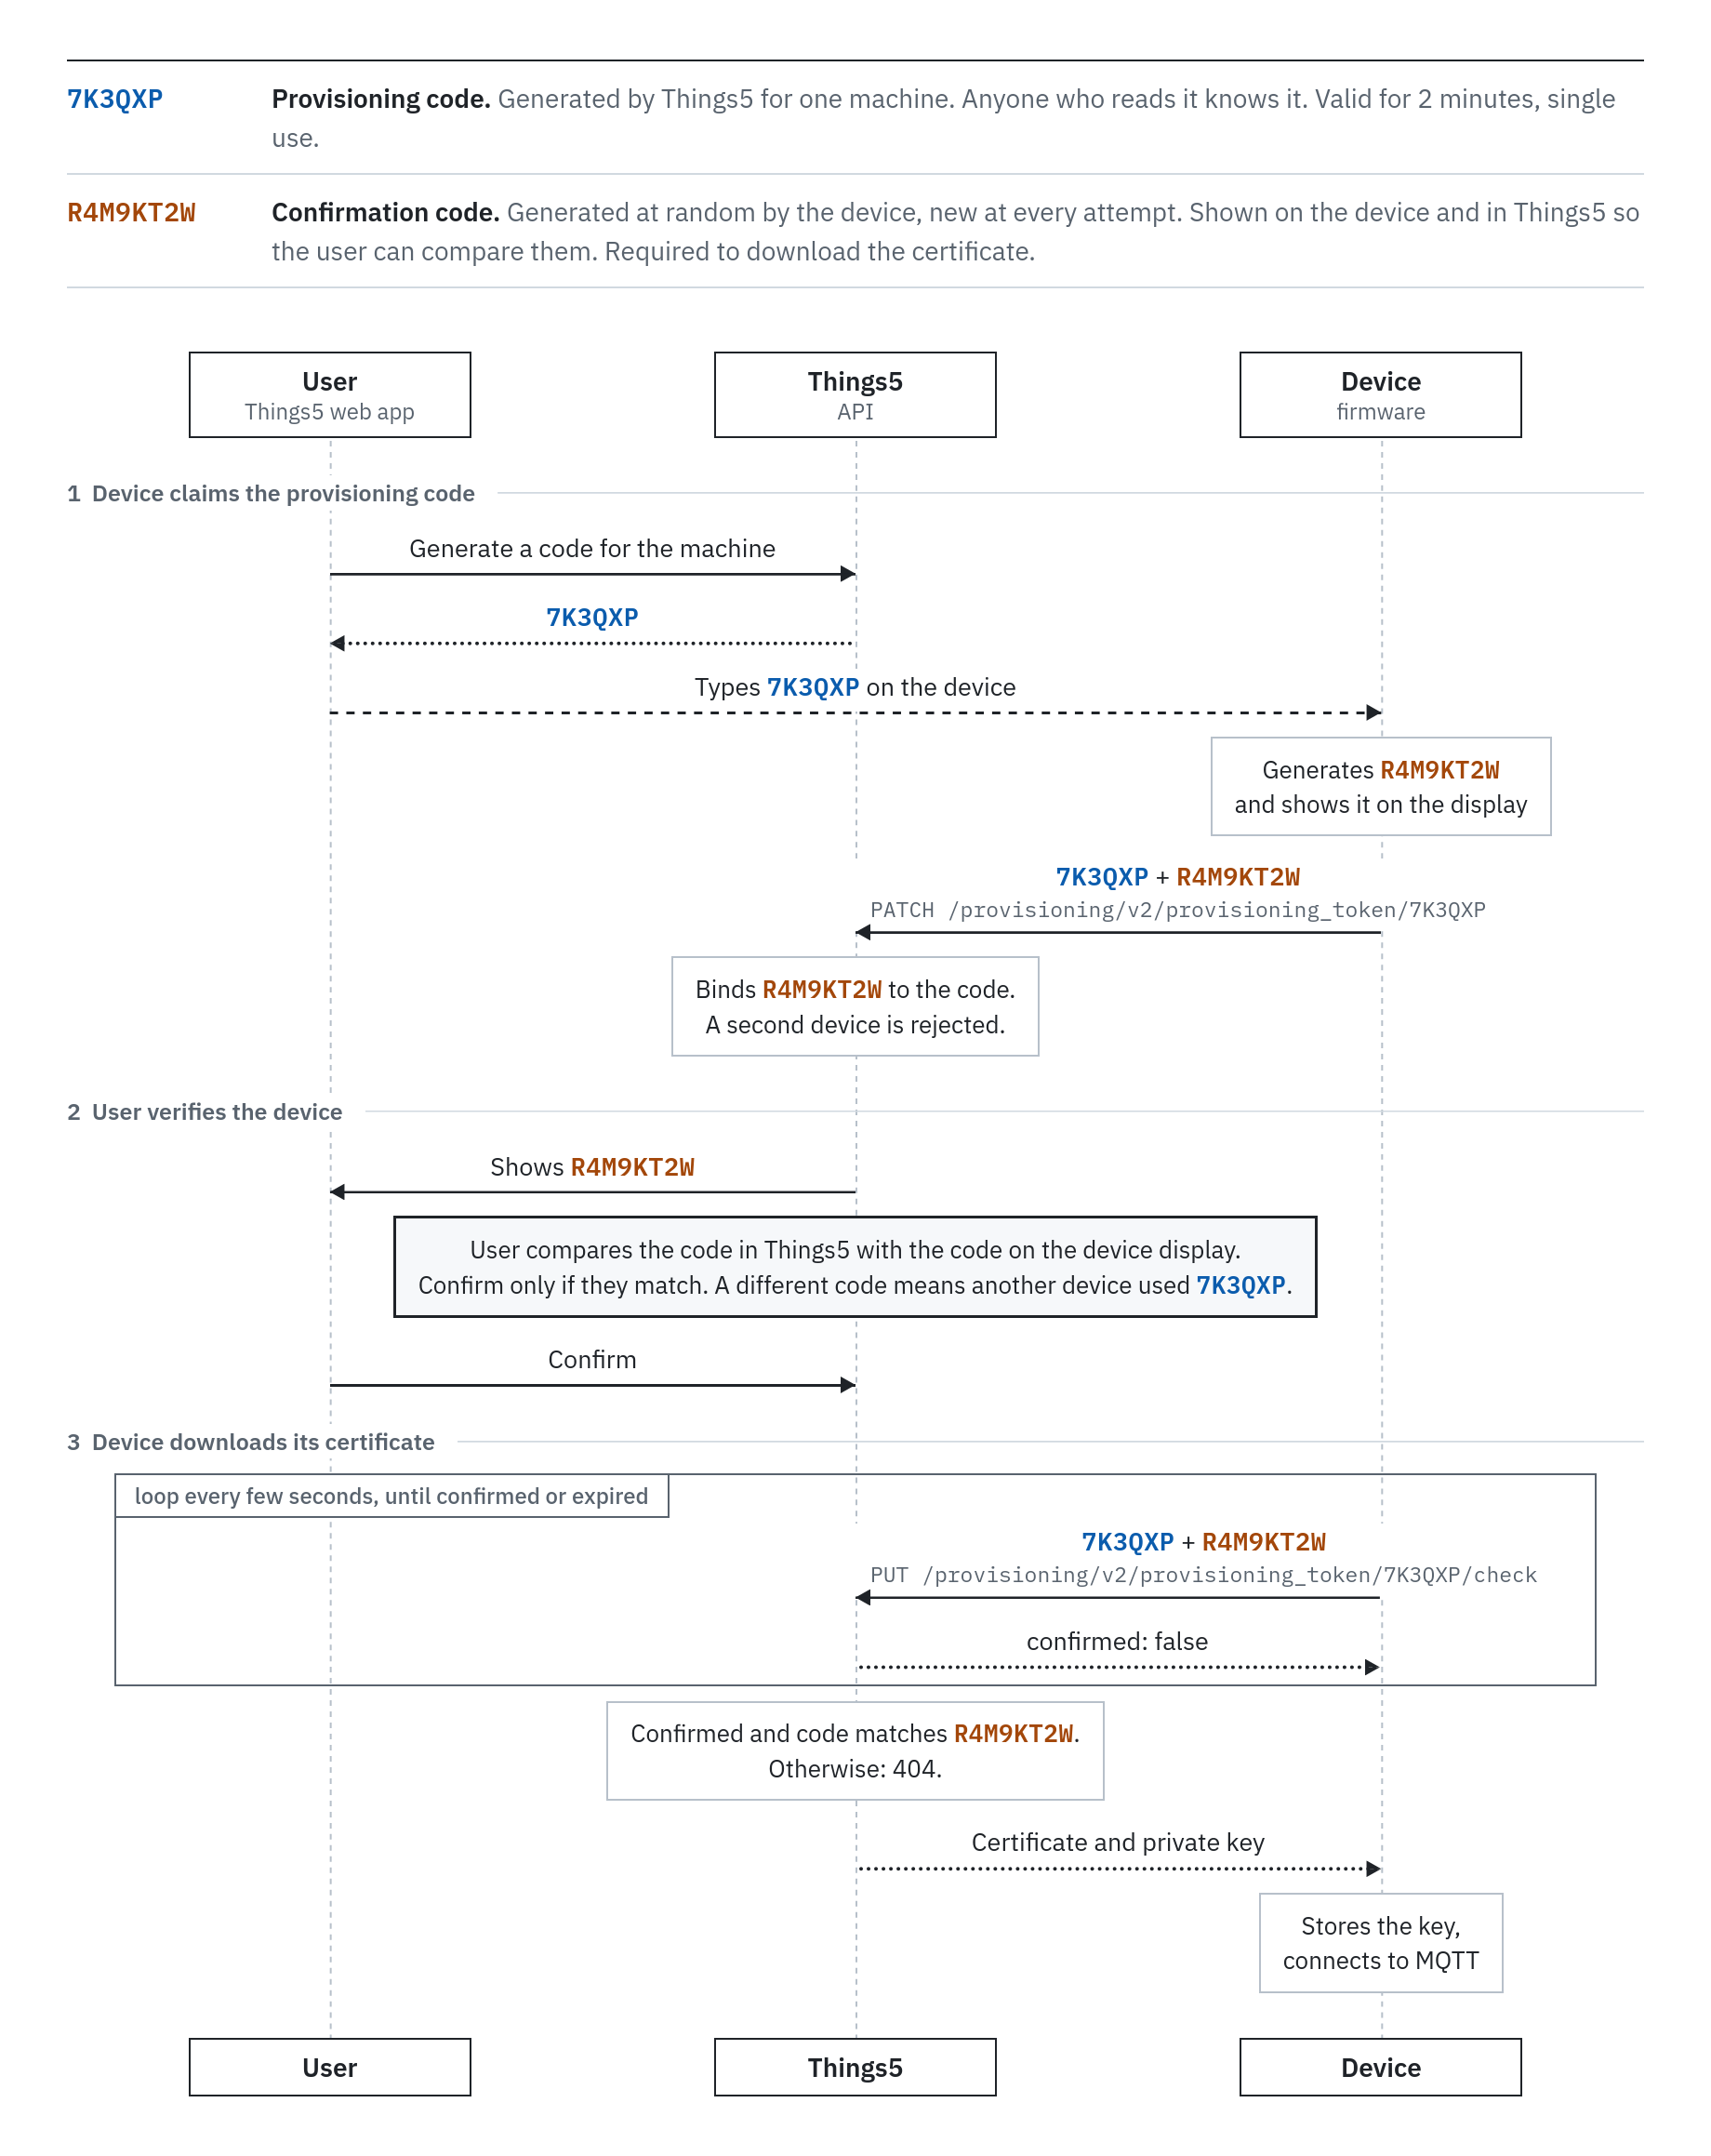
The provisioning code
- 6 characters from a 32-symbol alphabet (Crockford's base32: digits and letters, excluding I, L, O and U), case-insensitive. On input, O is read as 0, and I and L as 1. There are 32⁶ = 1,073,741,824 possible codes.
- Valid for 2 minutes, within which the whole procedure must be completed.
- Single use: once the certificate has been delivered it can no longer be used.
- Things5 limits attempts: it blocks clients that try too many wrong codes, and cancels the code after a few wrong confirmation codes.
What the firmware must do
All calls go to https://api.things5.digital.
-
Send the provisioning code and the confirmation code:
PATCH /provisioning/v2/provisioning_token/{code} Content-Type: application/json { "provisioning_token": { "confirmation_token": "{confirmation code}" } } -
Show the confirmation code to the user.
-
Poll Things5 until the user confirms, at most once every few seconds and never past the code's expiry:
PUT /provisioning/v2/provisioning_token/{code}/check
Content-Type: application/json

{ "confirmation_token": "{confirmation code}" }
Until the user confirms, the response contains
confirmed: falseand the expiry time (expires_at):{ "data": { "id": "{code}", "confirmed": false, "expires_at": "2026-11-15T10:32:00Z" } }After confirmation it contains the certificate and key:
{ "machine_id": "…", "certificate_id": "…", "certificate": "-----BEGIN CERTIFICATE-----…", "private_key": "-----BEGIN … PRIVATE KEY-----…", "public_key": "-----BEGIN PUBLIC KEY-----…", "ca": "-----BEGIN CERTIFICATE-----…" } -
Store the certificate and key, and connect to the MQTT broker.
Requirements
- HTTPS only, with server certificate verification.
- A random confirmation code generated for every provisioning.
- The private key stored in a protected area of the device, never written to logs, debug output or error messages.
Updated about 4 hours ago